Skin Deep: Highlighter system
During development of Skin Deep, we received playtest feedback that the gameplay’s cause and effect was sometimes unclear.
Why did that explosion just happen?
Why did the airlock decompress just now?
How did this enemy get destroyed?
This is partly due to how objects all “touch” each other in various ways – some objects create flammable gas clouds; any object can bump into and interact with buttons/levers/valves; a bullet hitting a metal surface will create an errant spark; etc etc.
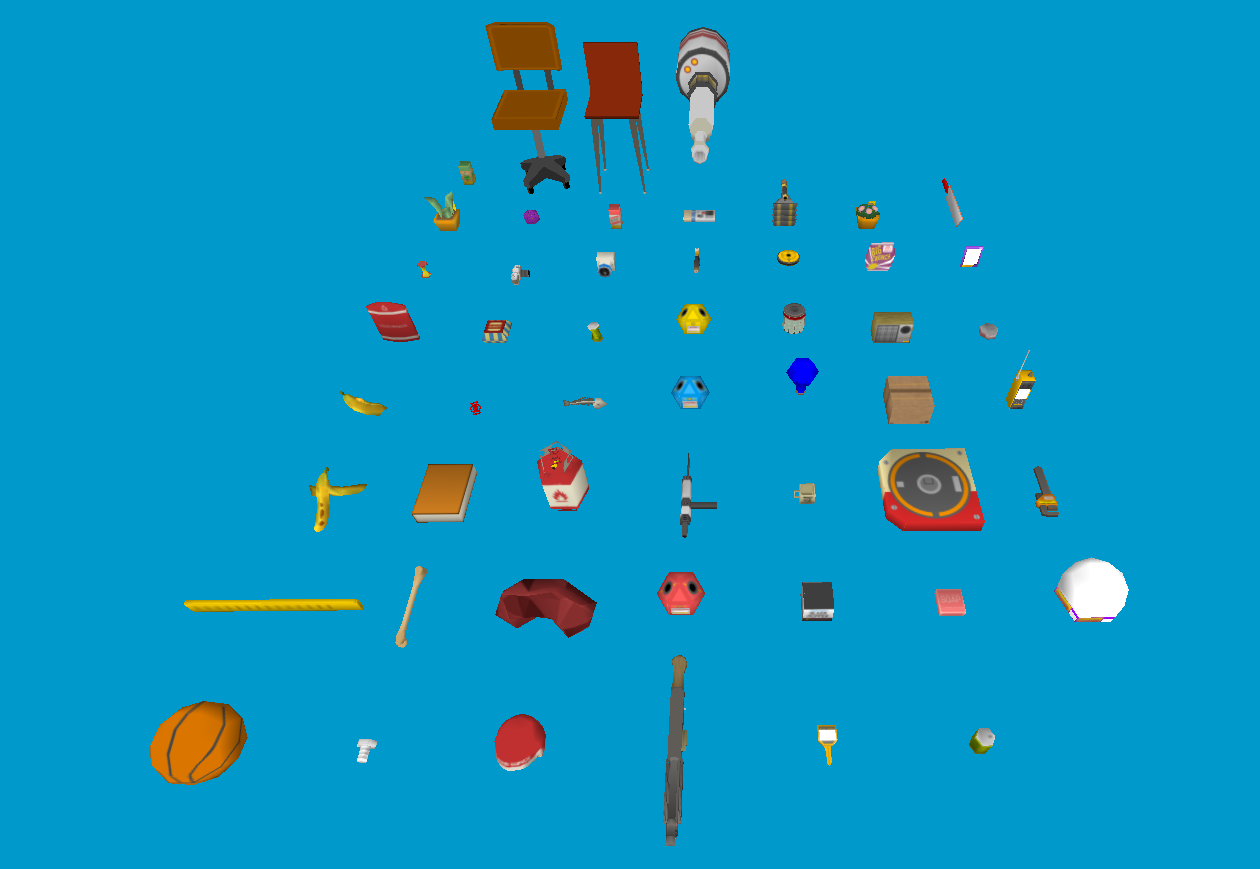 Some of the items in Skin Deep
Because objects all interact with one another, this creates situations where interesting spontaneous chain reactions can happen. Which is great!
But these chain reactions weren’t always clear to the player. Which is not great!
Solution #1: Event Log
An approach we tried was the Event Log. Here’s the Event Log in the top-right corner of the screen:
Footage from: https://www.youtube.com/watch?v=VS4hqIpyUl8
This helped some players gain a better understanding. However, while it alleviated the issue, it didn’t quite solve it.
During the “heat of the moment,” such as during a combat encounter or a high-pressure situation, it was not feasible for players to refer to the Event Log. They’re too busy focusing on the center of the screen and staying alive!
This was expected, but I’m a believer in always first approaching design issues with the most simple fix. I sometimes refer to this as a “cave man” fix. Oftentimes it’s all you need, and at the very least it’ll reveal something about the issue.
This led us to the next solution…
Solution #2: Highlighter System
The Highlighter System’s intention was to visually emphasize the event to the player:
Footage from: https://www.youtube.com/watch?v=VS4hqIpyUl8
The Highlighter System:
- paused the game world
- briefly took control of the player’s camera
- displayed text labels of the interaction
This ended up working well – it communicated the cause and effect, it helped clarify the game systems, it fit with the game’s tone, and was snappy.
Like many game systems, the Highlighter System went through quite a bit of iteration. The system was a balancing act – we wanted it to display events in the world, but it was important for it to not be annoying or confusing. We had to ensure it wouldn’t happen too often, or impede gameplay momentum, or feel like a waste of time, or be disorienting, or be ambiguous, or make players lose their spatial framing of the world.
I thought it would be interesting to share details of how the final version worked. Here it is!
STEP 1: Determine what to do
When a Highlight-able event happens in the world, we ask the Highlighter system to evaluate it.
A: If event is in player viewcone
We do a check to see if the event is within the player’s viewcone, and also do a LOS (line-of-sight) check:

If the player has unobstructed LOS (not blocked by walls, props, etc) and the event is near the center of the viewcone, then great: we don’t need to move or rotate the camera at all. Easy!
Proceed to Step 2.
B: If event is outside player viewcone
If the player has unobstructed LOS but the event is outside the player’s viewcone:

…or, if the event is near the edge of the player’s viewcone:

Then: we tell the camera to rotate to look at the event:

Proceed to Step 2.
C: If player LOS is obstructed
If the player does not have clear LOS to the event, such as a wall or prop in the way:

In this situation, we still make an attempt at making the Highlighter happen.
We do this by checking LOS at spots near the player. We brute-force check LOS like so:

Note: when finding a viable spot, we only check left/right and up/down. We intentionally do not check forward/backward – it felt disorienting when the camera moved on the forward axis.
✔️ If a viable spot is found:
We quietly move the camera to that spot:
 We limit how far to search for a viable spot, so the camera movement is generally subtle. Proceed to Step 2.
❌ If a viable spot is not found:
Then we simply don’t do the Highlighter cam.
STEP 2: Activate the camera
We pause the gameworld and switch to the Highlighter camera. If the camera needs to move or rotate, we do so here.
The Highlighter camera always originates from the player camera position/angle. We do this to avoid player disorientation – we always try to show things relative to the player’s current angle and spatial understanding of the space.
Proceed to Step 3.
STEP 3: UI setup
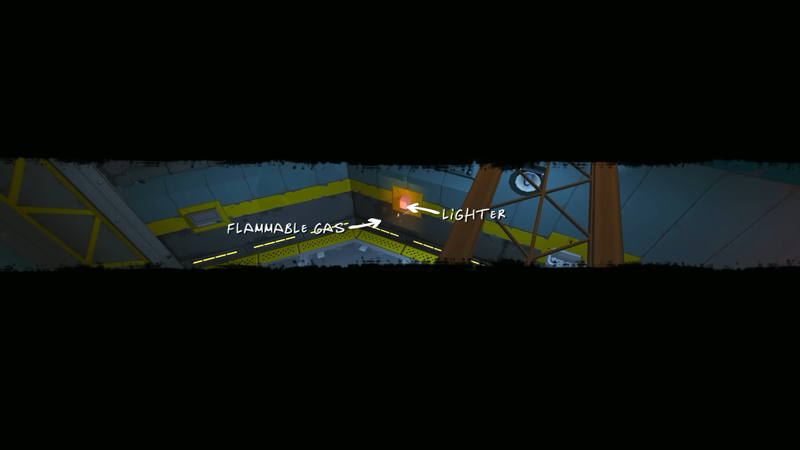
The Highlighter System’s UI displayed letterbox bars & text labels:
Example 1:
Example 2:
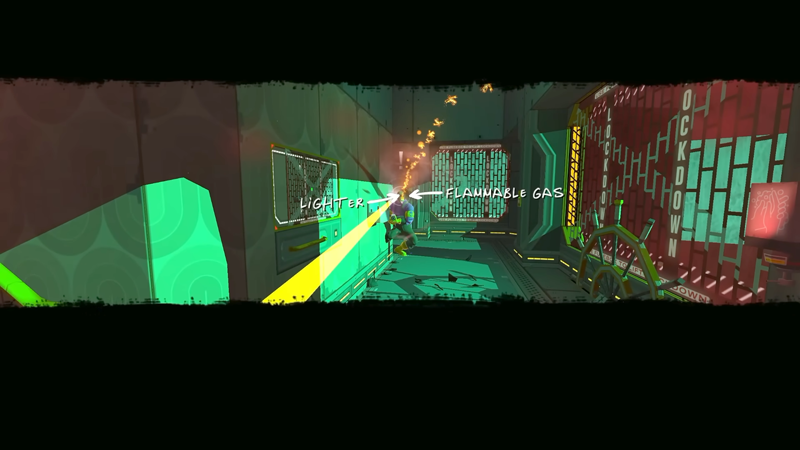
The Highlighter’s UI had to accommodate a pretty wide variety of situations – what if the camera was very close to the objects; what if the angle was weird, etc etc.
Here’s an overview of how it worked:
1. Get item bounds
First, we convert the objects’ bounding boxes to 2D screen space. This results in 2D rectangles that encompass the objects:

2. Expand the bounds
Then we expand these bound values, like so:
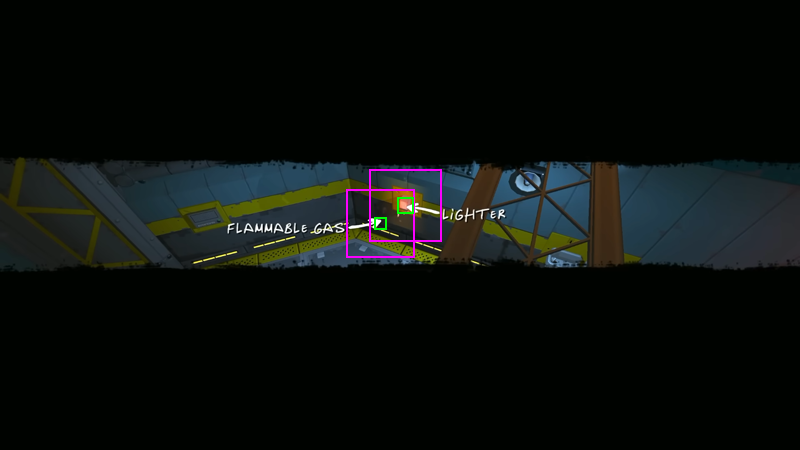
3. Activate letterbox
The letterbox bars then push in:

The letterbox bars use the expanded bounds to determine how far to push in.
4. Label placement
The labels use the 2D item bounds from earlier – they use this information to determine where to place their labels:
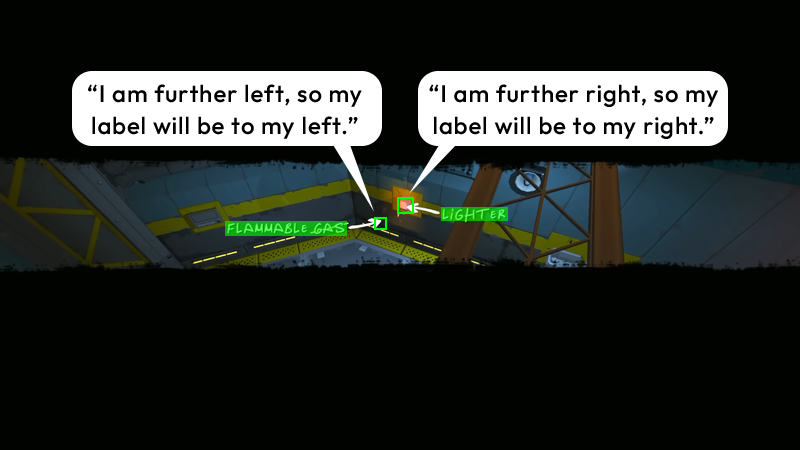
This was just a basic way to prevent labels from overlapping one another:
- The game looks at which object is more left and which is more right.
- Then prints a label to the left of the left object & prints a label to the right of the right object.
The arrow angle has some randomness. It’s sometimes pointing up, sometimes down. This is just to create some minor variance.
STEP 4: Done
There is no step 4. All done!
Other details
How it gets activated
Whenever an event happens, the event queries the Highlighter System to see if can be activated.
How often it happens
There’s a cooldown period of 1 second between Highligher System activations.
This is a pretty aggressive value – in practice, this worked for us. It culled out unwanted duplicate/simultaneous events, but still felt responsive to player actions.
Killcam
The Killcam system is similar, but separate, from the Highlighter system.
The Killcam activates when the final enemy of the level is destroyed. You get a slow-motion view of the final elimination:
Unlike the Highlighter camera, the Killcam is not concerned about being seamless and minimal. It more aggressively finds a place for the camera, even if it means moving the camera to a dramatically different spot/angle. Additionally, it does not pause the game world.
The reason being: the threats are all gone, so there’s less pressure to maintain player orientation at this point. This gives leeway to be less elegant & be more decadent.
Et al
For those curious, the Skin Deep source code is available under the GPL license, and the Highlighter System is specifically in this file.
The idea of the letterbox bars was from Samurai Gunn & Samurai Gunn 2:
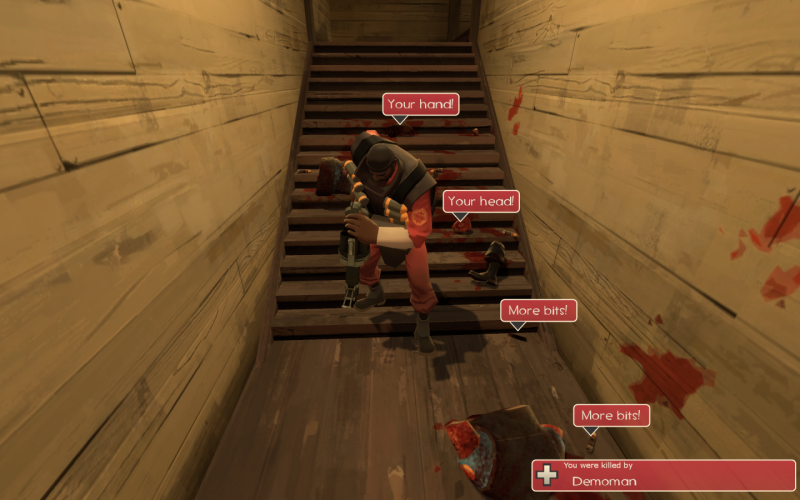
And the idea of the labels was from Team Fortress 2:
I enjoy working in design, art, and programming, and sometimes you get to do all three at the same time. I love it. I’m really happy with how the Highlighter System turned out – I’d love to see other folks try it in their own projects!